

In this blog, I am going to walk you through deploying a default Blazor server application created in Visual Studio 2019 in Azure App Service. We will see three different ways we can deploy a Blazor application:
- Use an import profile (Web App service profile) in Visual Studio 2019.
- Use the Azure Portal login in Visual Studio 2019.
- Publish in a specific subfolder in Azure.
Creating a Blazor server application
In this segment, we are going to create a Blazor server application using Visual Studio 2019.
- Open Visual Studio 2019 and create a new project.
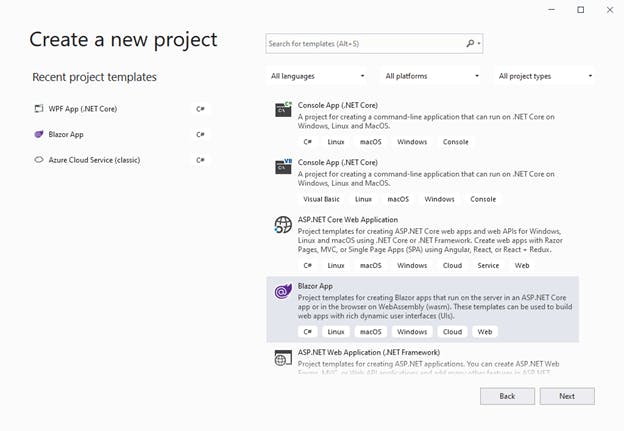
- Once Blazor App is selected, click Next to configure the project name and location.
- Save the application, and then click Create.
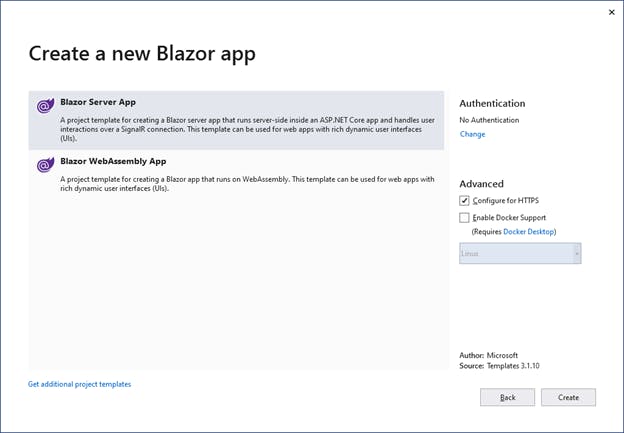
- Select Blazor Server App and click Create to complete the application creation.
Deploying in Azure Portal
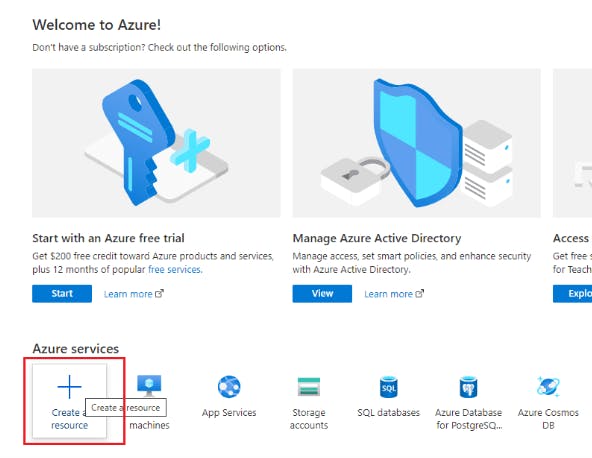
- If you don’t have a login for Azure, sign up to access the Azure Portal.
- Click Create a resource in Azure to create a resource group.
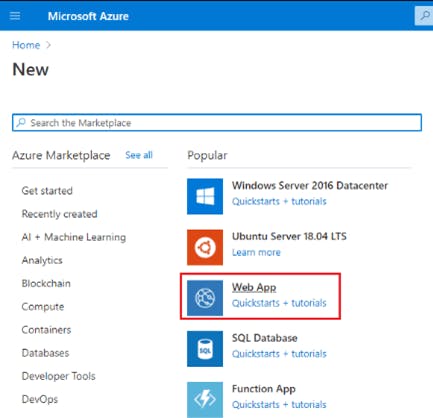
- Select Web App Azure application service.
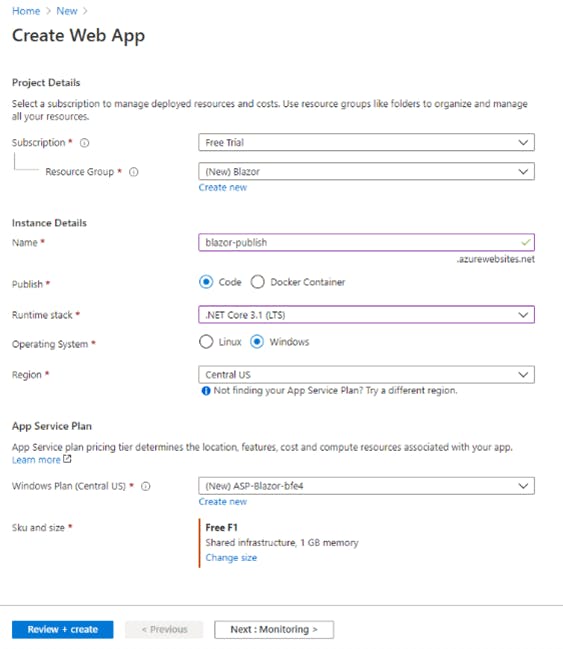
- Once Web App is selected, select the following options:
- Free Trial selected as the subscription.
- Create a resource group name. I have named mine Blazor.
- Update the Instance Details: Name: blazor-publish. The application hosted will be available in this URL: blazor-publish.azurewebsites.net. Select the Code box for Publish. Choose the .NET Core 3.1 LTS runtime stack and Windows operating system. Select the region in which to publish the app. I am choosing the Central US region for this demo.
- The app service plan with the Free F1 option will be selected by default, but this can be modified.
- Once this is done, click Review + create.
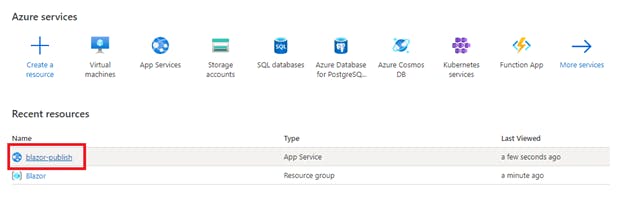
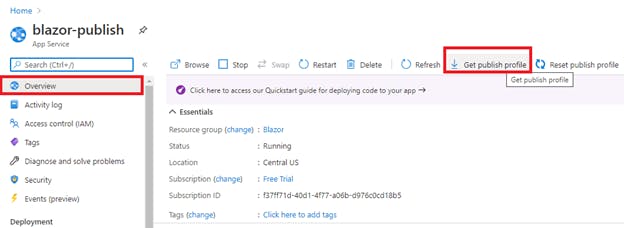
- After configuring the Web App service, get the publish profile for the Web App service to host the Blazor application. Select the created web app service (blazor-publish).
- Navigate to the overview section, click on Get publish profile, and save the profile locally.
Publish a Blazor server application in Azure
Using import-profile option
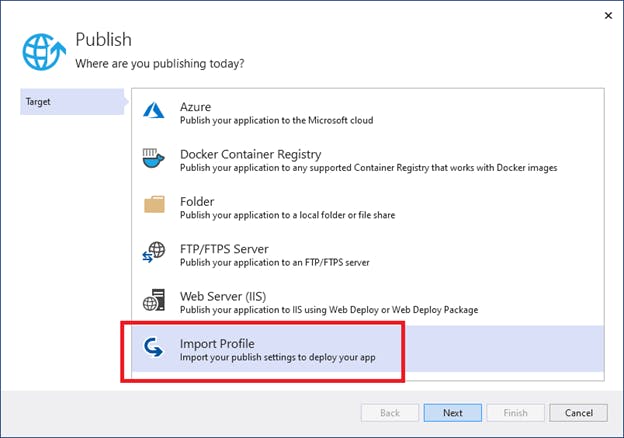
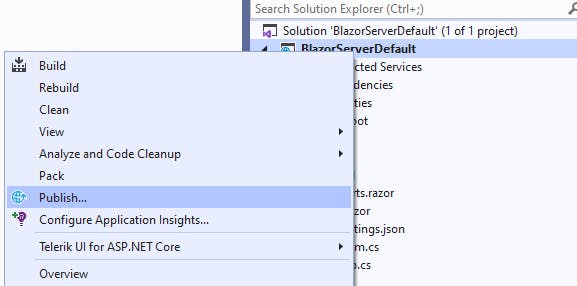
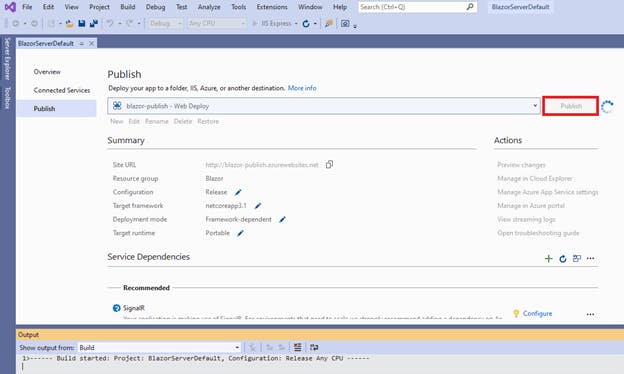
- Right-click the project and click Publish in the context menu.

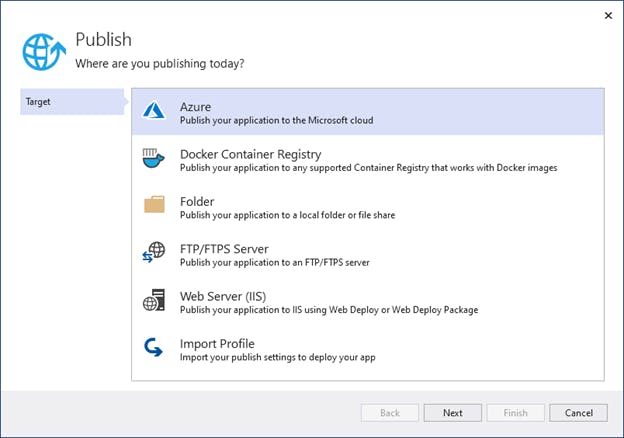
- Choose Import Profile and click Next. Then, locate the downloaded publish profile for the web app service.
- Finally, publish the application by clicking Publish. The application will be deployed and will be available in the URL blazor-publish.azurewebsites.net.

Publish using Azure account login
Right-click on the project and click Publish in the context menu.
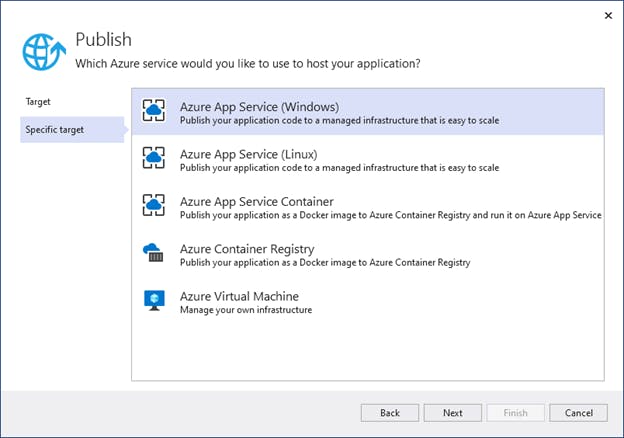
- Select Azure as the target and Azure App Service (Windows) as the specific target.
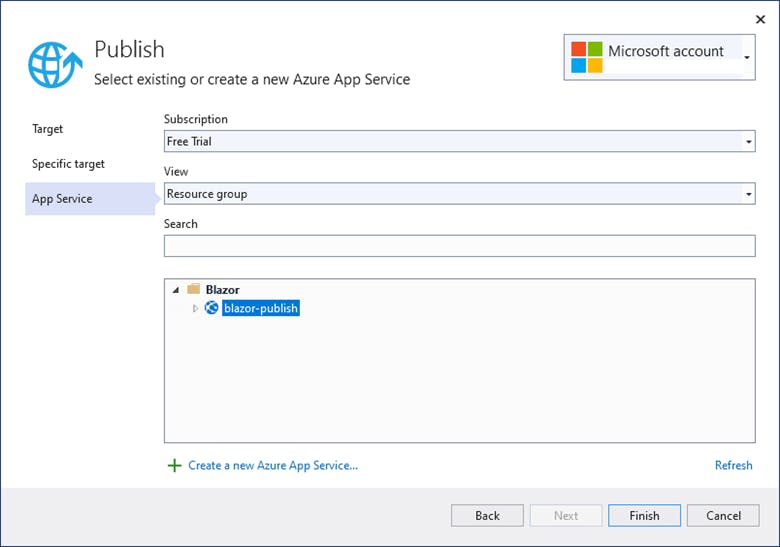
- You need to log into your Azure account and choose the web app service. Then, click Publish.
Now, the application will be deployed and will be available in the URL: https://blazor-publish.azurewebsites.net/ .

Publish in a specific subfolder in Azure
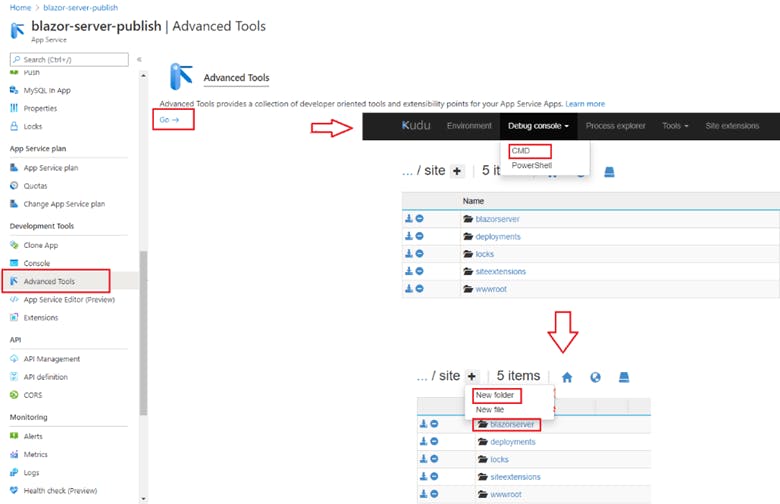
If you need to deploy the Blazor application in a specific subfolder in Azure, create the folder using the Advanced Tools tab under Development Tools in the app service. Click the Go link, choose CMD in the debug console, and click on the + button to add a new folder. Here I have named the folder blazor-server-publish.
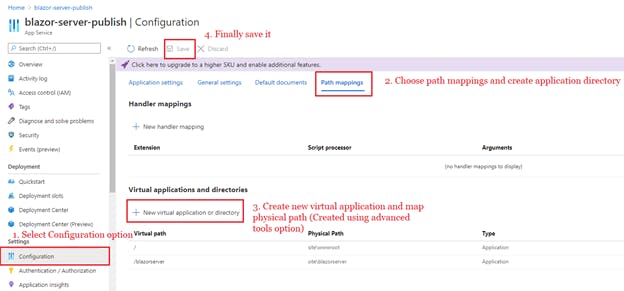
- Configure the path mappings for the created folder blazorserver. Set site \blazorserver as the physical path and /blazorserver as the virtual path.
Use the import Azure profile option. Locate the downloaded publish profile for the newly created web app service.
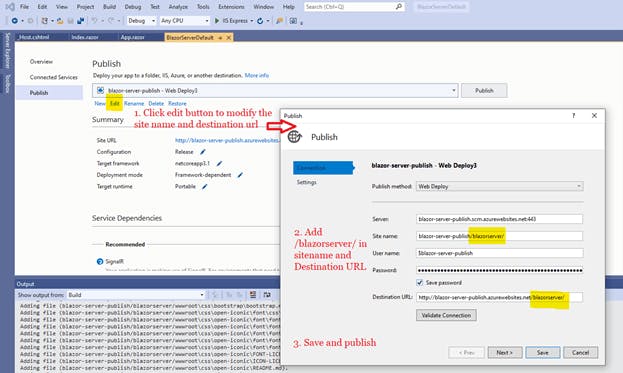
Edit the publish options to modify the site name and destination folder URL to include /blazorserver/.
Click Save. Then select Publish to launch the application in the specified subfolder.
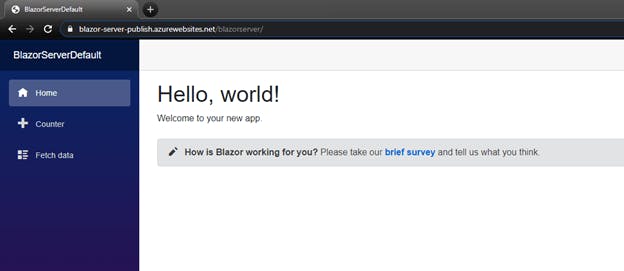
The application will be launched in the specified subfolder as shown in the following screenshot.
Summary
In this blog, you have learned the step-by-step procedure to create a Blazor server application, followed by the steps to deploy that application in the Azure Portal. All three methods to deploy the application are done using the publish profile option and Azure Portal login. I hope you found this article helpful.